> ## Documentation Index
> Fetch the complete documentation index at: https://dbhub.ai/llms.txt
> Use this file to discover all available pages before exploring further.
# Installation
## npm
The npm method requires **Node.js >= 22.5.0** (DBHub uses Node's built-in `node:sqlite` module). The Docker image bundles a compatible Node runtime, so no local Node install is needed when running via Docker.
```bash theme={null}
# PostgreSQL example
npx @bytebase/dbhub@latest \
--transport http \
--port 8080 \
--dsn "postgres://user:password@localhost:5432/dbname?sslmode=disable"
# Or use demo mode for testing
npx @bytebase/dbhub@latest --transport http --port 8080 --demo
```
```bash theme={null}
# Install globally
npm install -g @bytebase/dbhub@latest
# Run the server
dbhub --transport http --port 8080 --dsn "postgres://..."
# Or use demo mode for testing
dbhub --transport http --port 8080 --demo
```
### Minimal Installation
By default, DBHub attempts to install drivers for all supported databases (PostgreSQL, MySQL, MariaDB, SQL Server, SQLite). If you only need specific databases, you can skip the unnecessary drivers to reduce installation size.
This applies to `npm install` (global or local). When using `npx`, npm will attempt to install all optional dependencies, but some drivers may be skipped if their installation fails, a required transitive dependency is missing, or the platform is not supported.
```bash theme={null}
# Install with only the PostgreSQL driver
npm install -g @bytebase/dbhub@latest --omit=optional && npm install -g pg
# Install with only PostgreSQL and MySQL drivers
npm install -g @bytebase/dbhub@latest --omit=optional && npm install -g pg mysql2
```
Available driver packages:
* `pg` — PostgreSQL
* `mysql2` — MySQL
* `mariadb` — MariaDB
* `mssql` — SQL Server
SQLite uses the built-in `node:sqlite` module (Node.js 22.5+), so it requires no driver package or native compilation and is always available.
When a driver is not installed or a required dependency is missing (e.g., a transitive dependency like `@azure/core-client` for the SQL Server driver), DBHub will skip that connector at startup and log a message. All other connectors will work normally. SQLite (including `--demo` mode) needs no extra driver — it relies on the built-in `node:sqlite` module.
## Docker
```bash theme={null}
docker run --rm --init \
--name dbhub \
--publish 8080:8080 \
bytebase/dbhub \
--transport http \
--port 8080 \
--dsn "postgres://user:password@localhost:5432/dbname?sslmode=disable"
# Or use demo mode for testing
docker run --rm --init \
--name dbhub \
--publish 8080:8080 \
bytebase/dbhub \
--transport http \
--port 8080 \
--demo
```
When connecting to databases on your host machine from Docker, use `host.docker.internal` instead of `localhost`:
```bash theme={null}
--dsn "postgres://user:password@host.docker.internal:5432/dbname"
```
For development environments using Docker Compose, add DBHub to your `docker-compose.yml`:
```yaml docker-compose.yml theme={null}
services:
dbhub:
image: bytebase/dbhub:latest
container_name: dbhub
ports:
- "8080:8080"
environment:
- DBHUB_LOG_LEVEL=info
command:
- --transport
- http
- --port
- "8080"
- --dsn
- "postgres://user:password@database:5432/dbname"
depends_on:
- database
database:
image: postgres:15-alpine
environment:
POSTGRES_PASSWORD: password
POSTGRES_DB: dbname
```
## Client Integration
Once DBHub is installed and running, configure your MCP client to connect to it.
### Claude Code
For local database connections, use stdio transport:
```bash theme={null}
claude mcp add --transport stdio dbhub -- npx @bytebase/dbhub@latest --transport stdio --dsn "postgres://user:password@localhost:5432/dbname"
```
The `--` separates Claude's flags from DBHub's arguments. Everything after `--` is the DBHub command.
For remote or shared database servers, use HTTP transport:
```bash theme={null}
claude mcp add --transport http dbhub http://localhost:8080/mcp
```
This connects to a DBHub server running with HTTP transport:
```bash theme={null}
npx @bytebase/dbhub@latest --transport http --port 8080 --dsn "postgres://user:password@localhost:5432/dbname"
```
For project-specific database connections shared with your team, create `.mcp.json` in your project root.
```json .mcp.json theme={null}
{
"mcpServers": {
"dbhub": {
"type": "stdio",
"command": "npx",
"args": [
"@bytebase/dbhub@latest",
"--transport",
"stdio",
"--dsn",
"postgres://user:password@localhost:5432/dbname"
]
}
}
}
```
Use environment variable expansion for sensitive values:
```json .mcp.json theme={null}
{
"mcpServers": {
"dbhub": {
"type": "stdio",
"command": "npx",
"args": [
"@bytebase/dbhub@latest",
"--transport",
"stdio",
"--dsn",
"${DATABASE_URL}"
]
}
}
}
```
```json .mcp.json theme={null}
{
"mcpServers": {
"dbhub": {
"type": "http",
"url": "http://localhost:8080/mcp"
}
}
}
```
For personal configuration across all projects:
```bash theme={null}
claude mcp add --scope user dbhub -- npx @bytebase/dbhub@latest --transport stdio --dsn "postgres://user:password@localhost:5432/dbname"
```
Or manually edit the user configuration file:
Edit `~/.claude/settings.json` and add to the `mcpServers` section.
Edit `%USERPROFILE%\.claude\settings.json` and add to the `mcpServers` section.
**Using DBHub:**
Start Claude Code in your project directory:
```bash theme={null}
claude
```
Verify DBHub is loaded:
```bash theme={null}
/mcp
```
**References:**
* [Claude Code MCP Documentation](https://code.claude.com/docs/en/mcp)
### Claude Desktop
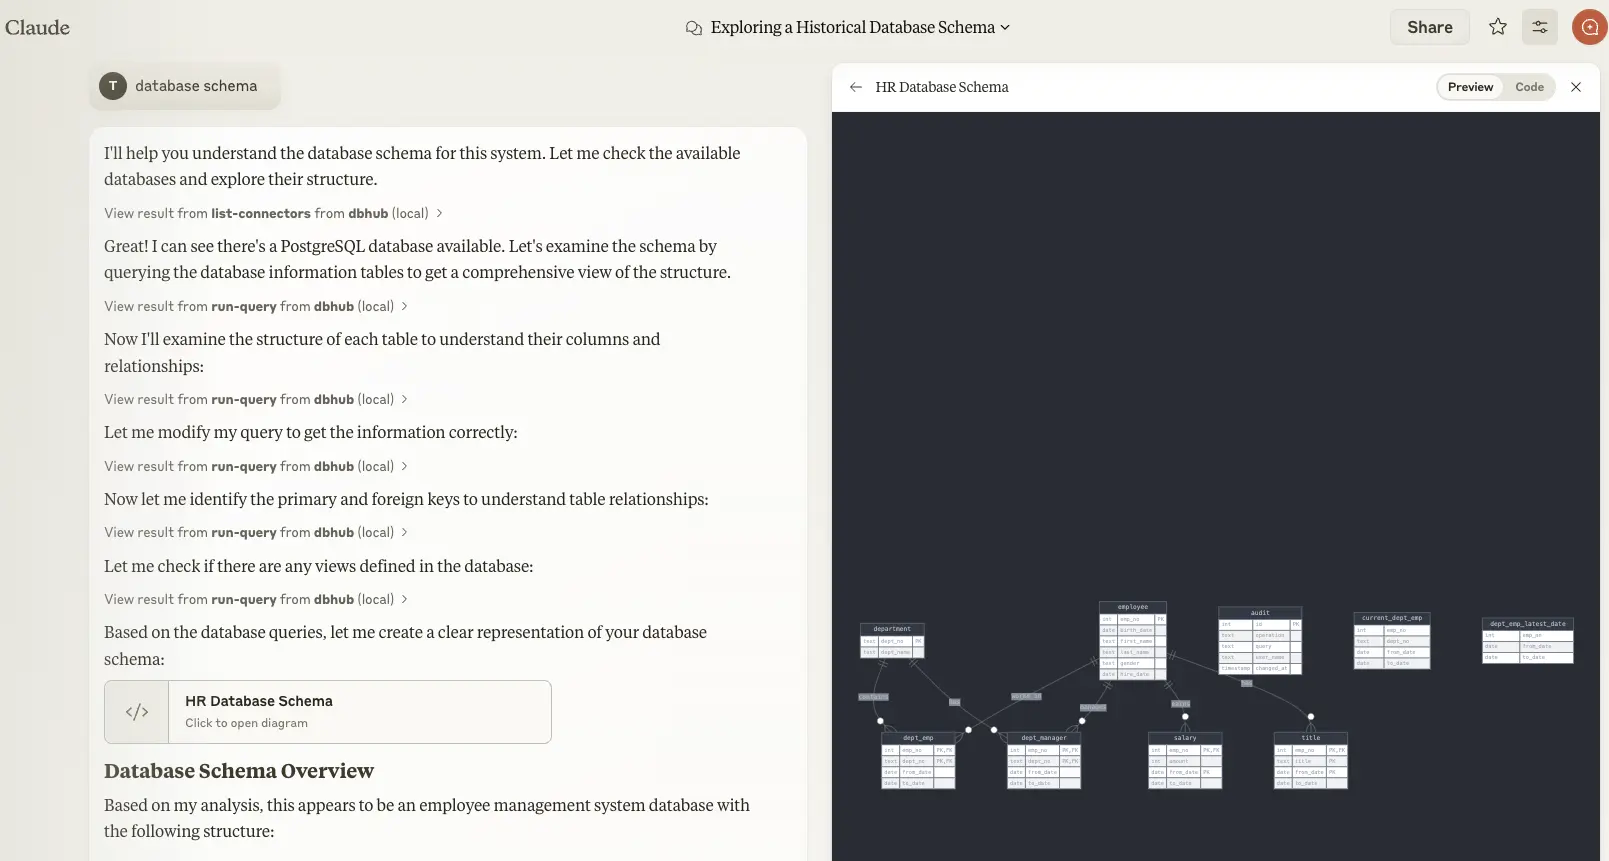
Edit `~/Library/Application Support/Claude/claude_desktop_config.json`:
```json ~/Library/Application Support/Claude/claude_desktop_config.json theme={null}
{
"mcpServers": {
"dbhub": {
"command": "npx",
"args": [
"@bytebase/dbhub@latest",
"--transport",
"stdio",
"--dsn",
"postgres://user:password@localhost:5432/dbname"
]
}
}
}
```
Edit `%APPDATA%\Claude\claude_desktop_config.json`:
```json theme={null}
{
"mcpServers": {
"dbhub": {
"command": "npx",
"args": [
"@bytebase/dbhub@latest",
"--transport",
"stdio",
"--dsn",
"postgres://user:password@localhost:5432/dbname"
]
}
}
}
```
For testing, you can use the built-in demo database:
```json ~/Library/Application Support/Claude/claude_desktop_config.json theme={null}
{
"mcpServers": {
"dbhub": {
"command": "npx",
"args": [
"@bytebase/dbhub@latest",
"--transport",
"stdio",
"--demo"
]
}
}
}
```
**Troubleshooting:**
* Verify your DSN connection string is correct
* Check that the database is accessible from your machine
* Review Claude Desktop logs: `~/Library/Logs/Claude/mcp*.log` (MacOS)
**References:**
* [Claude Desktop MCP Documentation](https://support.claude.com/en/articles/10949351-getting-started-with-local-mcp-servers-on-claude-desktop)
### Cursor
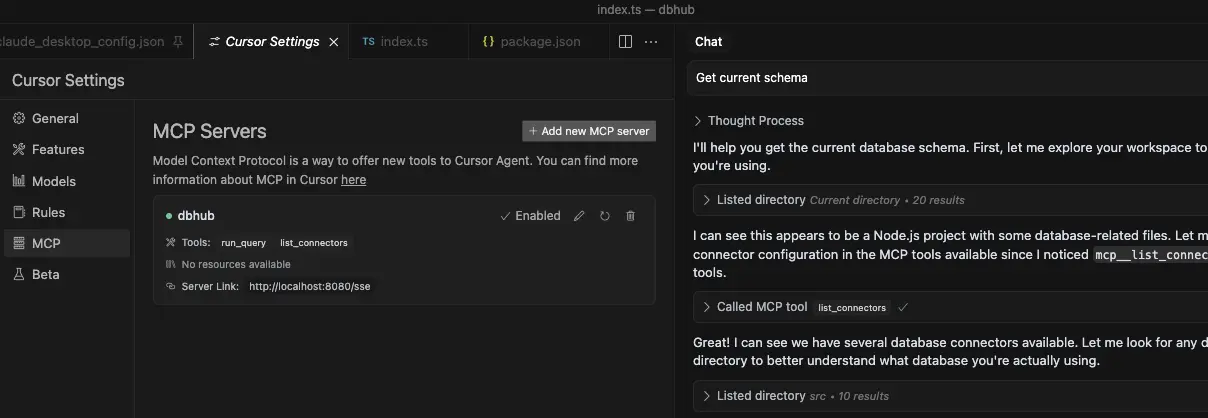
Click the link below to install DBHub in Cursor:
 After installing, edit the DSN in your Cursor MCP settings to point to your database.
For local database connections, use stdio transport:
**MacOS/Linux** - Edit `~/.cursor/mcp.json`:
```json ~/.cursor/mcp.json theme={null}
{
"mcpServers": {
"dbhub": {
"command": "npx",
"args": [
"@bytebase/dbhub@latest",
"--transport",
"stdio",
"--dsn",
"postgres://user:password@localhost:5432/dbname"
]
}
}
}
```
**Windows** - Edit `%USERPROFILE%\.cursor\mcp.json`:
```json %USERPROFILE%.cursor\mcp.json theme={null}
{
"mcpServers": {
"dbhub": {
"command": "npx",
"args": [
"@bytebase/dbhub@latest",
"--transport",
"stdio",
"--dsn",
"postgres://user:password@localhost:5432/dbname"
]
}
}
}
```
For remote or shared database servers, use HTTP transport:
**MacOS/Linux** - Edit `~/.cursor/mcp.json`:
```json ~/.cursor/mcp.json theme={null}
{
"mcpServers": {
"dbhub": {
"url": "http://localhost:8080/mcp"
}
}
}
```
**Windows** - Edit `%USERPROFILE%\.cursor\mcp.json`:
```json %USERPROFILE%.cursor\mcp.json theme={null}
{
"mcpServers": {
"dbhub": {
"url": "http://localhost:8080/mcp"
}
}
}
```
This connects to a DBHub server running with HTTP transport:
```bash theme={null}
npx @bytebase/dbhub@latest --transport http --port 8080 --dsn "postgres://user:password@localhost:5432/dbname"
```
For project-specific database connections, create `.cursor/mcp.json` in your project root:
```json .cursor/mcp.json theme={null}
{
"mcpServers": {
"project-db": {
"command": "npx",
"args": [
"@bytebase/dbhub@latest",
"--transport",
"stdio",
"--config",
"${workspaceFolder}/dbhub.toml"
]
}
}
}
```
**References:**
* [Cursor MCP Documentation](https://cursor.com/docs/context/mcp)
### VS Code
VS Code has native MCP support through GitHub Copilot. Create `.vscode/mcp.json` in your project root:
For local database connections, use stdio transport:
```json .vscode/mcp.json theme={null}
{
"servers": {
"dbhub": {
"type": "stdio",
"command": "npx",
"args": [
"@bytebase/dbhub@latest",
"--transport",
"stdio",
"--dsn",
"postgres://user:password@localhost:5432/dbname"
]
}
}
}
```
For remote or shared database servers, use HTTP transport:
```json .vscode/mcp.json theme={null}
{
"servers": {
"dbhub": {
"type": "http",
"url": "http://localhost:8080/mcp"
}
}
}
```
This connects to a DBHub server running with HTTP transport:
```bash theme={null}
npx @bytebase/dbhub@latest --transport http --port 8080 --dsn "postgres://user:password@localhost:5432/dbname"
```
For sensitive data like passwords, use input variables:
```json .vscode/mcp.json theme={null}
{
"inputs": [
{
"type": "promptString",
"id": "db-dsn",
"description": "Database connection string",
"password": true
}
],
"servers": {
"dbhub": {
"type": "stdio",
"command": "npx",
"args": [
"@bytebase/dbhub@latest",
"--transport",
"stdio",
"--dsn",
"${input:db-dsn}"
]
}
}
}
```
For multi-database setups, use a config file:
```json .vscode/mcp.json theme={null}
{
"servers": {
"dbhub": {
"type": "stdio",
"command": "npx",
"args": [
"@bytebase/dbhub@latest",
"--transport",
"stdio",
"--config",
"${workspaceFolder}/dbhub.toml"
]
}
}
}
```
**References:**
* [VS Code MCP Documentation](https://code.visualstudio.com/docs/copilot/customization/mcp-servers)
### GitHub Copilot CLI
Use the Copilot CLI to interactively add the MCP server:
```
/mcp add
```
When prompted, you'll need to provide:
* **Server type**: select `local` (the default)
* **Server name**: for example, `dbhub`
* **Command**: `npx @bytebase/dbhub@latest`
* **Arguments**: transport (e.g., `--transport stdio`) and connection details (either `--dsn` connection string or `--demo` for the demo database)
Create or edit the configuration file `~/.copilot/mcp-config.json`:
```json ~/.copilot/mcp-config.json theme={null}
{
"mcpServers": {
"dbhub": {
"command": "npx",
"args": [
"@bytebase/dbhub@latest",
"--transport",
"stdio",
"--dsn",
"postgres://user:password@localhost:5432/dbname"
]
}
}
}
```
For testing, use the built-in demo database:
```json ~/.copilot/mcp-config.json theme={null}
{
"mcpServers": {
"dbhub": {
"command": "npx",
"args": [
"@bytebase/dbhub@latest",
"--transport",
"stdio",
"--demo"
]
}
}
}
```
**References:**
* [Copilot CLI MCP Documentation](https://docs.github.com/en/copilot/how-tos/provide-context/use-mcp/extend-copilot-chat-with-mcp)
### Codex
```bash theme={null}
# Connect to your database
codex mcp add dbhub -- npx @bytebase/dbhub@latest --transport stdio --dsn "postgres://user:password@localhost:5432/dbname"
# Or use demo mode for testing
codex mcp add dbhub -- npx @bytebase/dbhub@latest --transport stdio --demo
```
```toml ~/.codex/config.toml theme={null}
# Connect to your database
[mcp_servers.dbhub]
command = "npx"
args = ["@bytebase/dbhub@latest", "--transport", "stdio", "--dsn", "postgres://user:password@localhost:5432/dbname"]
# Or use demo mode for testing
[mcp_servers.dbhub]
command = "npx"
args = ["@bytebase/dbhub@latest", "--transport", "stdio", "--demo"]
```
```bash theme={null}
/mcp
🔌 MCP Tools
• dbhub
• Status: enabled
• Auth: Unsupported
• Command: npx -y @bytebase/dbhub@latest --demo
• Tools: execute_sql
• Resources: schemas (db://schemas)
• Resource templates: tables_in_schema (db://schemas/{schemaName}/tables), table_structure_in_schema (db://schemas/{schemaName}/
tables/{tableName}), indexes_in_table (db://schemas/{schemaName}/tables/{tableName}/indexes), procedures_in_schema (db://schemas/
{schemaName}/procedures), procedure_detail_in_schema (db://schemas/{schemaName}/procedures/{procedureName})
```
**References:**
* [Codex MCP Documentation](https://developers.openai.com/codex/mcp/)
### Dify
DBHub must be running as an HTTP server for Dify to connect. Start DBHub with HTTP transport:
```bash theme={null}
npx @bytebase/dbhub@latest --transport http --port 8080 --dsn "postgres://user:password@localhost:5432/dbname"
```
**Configuration:**
1. In Dify, navigate to **Tools → MCP**
2. Click **Add MCP Server (HTTP)**
3. Configure the server:
* **Server URL**: `http://localhost:8080/mcp` (or your DBHub host)
* **Name**: `DBHub`
* **Server Identifier**: `dbhub` (permanent, max 24 characters)
4. Click save. Dify will automatically discover DBHub's tools.
**Using DBHub Tools:**
Once connected, DBHub tools are available in:
* **Agents**: Tools appear alongside built-in tools, use "Add All" to enable all DBHub tools
* **Workflows**: Tools appear as available node types
**Multi-Database Setup:**
For multiple databases, use a config file:
```bash theme={null}
npx @bytebase/dbhub@latest --transport http --port 8080 --config /path/to/dbhub.toml
```
**Demo Mode:**
For testing, use the built-in demo database:
```bash theme={null}
npx @bytebase/dbhub@latest --transport http --port 8080 --demo
```
**Limitations:**
* Dify only supports HTTP transport (not stdio)
* DBHub must be network-accessible from Dify
**References:**
* [Dify MCP Documentation](https://docs.dify.ai/en/guides/tools/mcp)
### LibreChat
DBHub can be integrated with [LibreChat](https://www.librechat.ai/) using either **stdio** or **Streamable HTTP** transport.
```yaml librechat.yaml theme={null}
mcpServers:
dbhub:
type: stdio
command: npx
args:
- -y
- "@bytebase/dbhub@latest"
- "--dsn"
- "postgres://user:password@localhost:5432/dbname"
timeout: 60000
```
For demo mode:
```yaml librechat.yaml theme={null}
mcpServers:
dbhub:
type: stdio
command: npx
args:
- -y
- "@bytebase/dbhub@latest"
- "--demo"
timeout: 60000
```
```yaml librechat.yaml theme={null}
mcpServers:
dbhub:
type: streamable-http
url: http://host.docker.internal:8080/mcp
timeout: 60000
```
**Docker Networking:** When LibreChat runs in Docker (e.g., with docker-compose), use `host.docker.internal:8080` to connect to DBHub running on your host machine. This is Docker's special DNS name that resolves to the host's IP address.
For native installations, use `http://localhost:8080/mcp` instead.
**References:**
* [LibreChat MCP Documentation](https://www.librechat.ai/docs/configuration/librechat_yaml/object_structure/mcp_servers)
After installing, edit the DSN in your Cursor MCP settings to point to your database.
For local database connections, use stdio transport:
**MacOS/Linux** - Edit `~/.cursor/mcp.json`:
```json ~/.cursor/mcp.json theme={null}
{
"mcpServers": {
"dbhub": {
"command": "npx",
"args": [
"@bytebase/dbhub@latest",
"--transport",
"stdio",
"--dsn",
"postgres://user:password@localhost:5432/dbname"
]
}
}
}
```
**Windows** - Edit `%USERPROFILE%\.cursor\mcp.json`:
```json %USERPROFILE%.cursor\mcp.json theme={null}
{
"mcpServers": {
"dbhub": {
"command": "npx",
"args": [
"@bytebase/dbhub@latest",
"--transport",
"stdio",
"--dsn",
"postgres://user:password@localhost:5432/dbname"
]
}
}
}
```
For remote or shared database servers, use HTTP transport:
**MacOS/Linux** - Edit `~/.cursor/mcp.json`:
```json ~/.cursor/mcp.json theme={null}
{
"mcpServers": {
"dbhub": {
"url": "http://localhost:8080/mcp"
}
}
}
```
**Windows** - Edit `%USERPROFILE%\.cursor\mcp.json`:
```json %USERPROFILE%.cursor\mcp.json theme={null}
{
"mcpServers": {
"dbhub": {
"url": "http://localhost:8080/mcp"
}
}
}
```
This connects to a DBHub server running with HTTP transport:
```bash theme={null}
npx @bytebase/dbhub@latest --transport http --port 8080 --dsn "postgres://user:password@localhost:5432/dbname"
```
For project-specific database connections, create `.cursor/mcp.json` in your project root:
```json .cursor/mcp.json theme={null}
{
"mcpServers": {
"project-db": {
"command": "npx",
"args": [
"@bytebase/dbhub@latest",
"--transport",
"stdio",
"--config",
"${workspaceFolder}/dbhub.toml"
]
}
}
}
```
**References:**
* [Cursor MCP Documentation](https://cursor.com/docs/context/mcp)
### VS Code
VS Code has native MCP support through GitHub Copilot. Create `.vscode/mcp.json` in your project root:
For local database connections, use stdio transport:
```json .vscode/mcp.json theme={null}
{
"servers": {
"dbhub": {
"type": "stdio",
"command": "npx",
"args": [
"@bytebase/dbhub@latest",
"--transport",
"stdio",
"--dsn",
"postgres://user:password@localhost:5432/dbname"
]
}
}
}
```
For remote or shared database servers, use HTTP transport:
```json .vscode/mcp.json theme={null}
{
"servers": {
"dbhub": {
"type": "http",
"url": "http://localhost:8080/mcp"
}
}
}
```
This connects to a DBHub server running with HTTP transport:
```bash theme={null}
npx @bytebase/dbhub@latest --transport http --port 8080 --dsn "postgres://user:password@localhost:5432/dbname"
```
For sensitive data like passwords, use input variables:
```json .vscode/mcp.json theme={null}
{
"inputs": [
{
"type": "promptString",
"id": "db-dsn",
"description": "Database connection string",
"password": true
}
],
"servers": {
"dbhub": {
"type": "stdio",
"command": "npx",
"args": [
"@bytebase/dbhub@latest",
"--transport",
"stdio",
"--dsn",
"${input:db-dsn}"
]
}
}
}
```
For multi-database setups, use a config file:
```json .vscode/mcp.json theme={null}
{
"servers": {
"dbhub": {
"type": "stdio",
"command": "npx",
"args": [
"@bytebase/dbhub@latest",
"--transport",
"stdio",
"--config",
"${workspaceFolder}/dbhub.toml"
]
}
}
}
```
**References:**
* [VS Code MCP Documentation](https://code.visualstudio.com/docs/copilot/customization/mcp-servers)
### GitHub Copilot CLI
Use the Copilot CLI to interactively add the MCP server:
```
/mcp add
```
When prompted, you'll need to provide:
* **Server type**: select `local` (the default)
* **Server name**: for example, `dbhub`
* **Command**: `npx @bytebase/dbhub@latest`
* **Arguments**: transport (e.g., `--transport stdio`) and connection details (either `--dsn` connection string or `--demo` for the demo database)
Create or edit the configuration file `~/.copilot/mcp-config.json`:
```json ~/.copilot/mcp-config.json theme={null}
{
"mcpServers": {
"dbhub": {
"command": "npx",
"args": [
"@bytebase/dbhub@latest",
"--transport",
"stdio",
"--dsn",
"postgres://user:password@localhost:5432/dbname"
]
}
}
}
```
For testing, use the built-in demo database:
```json ~/.copilot/mcp-config.json theme={null}
{
"mcpServers": {
"dbhub": {
"command": "npx",
"args": [
"@bytebase/dbhub@latest",
"--transport",
"stdio",
"--demo"
]
}
}
}
```
**References:**
* [Copilot CLI MCP Documentation](https://docs.github.com/en/copilot/how-tos/provide-context/use-mcp/extend-copilot-chat-with-mcp)
### Codex
```bash theme={null}
# Connect to your database
codex mcp add dbhub -- npx @bytebase/dbhub@latest --transport stdio --dsn "postgres://user:password@localhost:5432/dbname"
# Or use demo mode for testing
codex mcp add dbhub -- npx @bytebase/dbhub@latest --transport stdio --demo
```
```toml ~/.codex/config.toml theme={null}
# Connect to your database
[mcp_servers.dbhub]
command = "npx"
args = ["@bytebase/dbhub@latest", "--transport", "stdio", "--dsn", "postgres://user:password@localhost:5432/dbname"]
# Or use demo mode for testing
[mcp_servers.dbhub]
command = "npx"
args = ["@bytebase/dbhub@latest", "--transport", "stdio", "--demo"]
```
```bash theme={null}
/mcp
🔌 MCP Tools
• dbhub
• Status: enabled
• Auth: Unsupported
• Command: npx -y @bytebase/dbhub@latest --demo
• Tools: execute_sql
• Resources: schemas (db://schemas)
• Resource templates: tables_in_schema (db://schemas/{schemaName}/tables), table_structure_in_schema (db://schemas/{schemaName}/
tables/{tableName}), indexes_in_table (db://schemas/{schemaName}/tables/{tableName}/indexes), procedures_in_schema (db://schemas/
{schemaName}/procedures), procedure_detail_in_schema (db://schemas/{schemaName}/procedures/{procedureName})
```
**References:**
* [Codex MCP Documentation](https://developers.openai.com/codex/mcp/)
### Dify
DBHub must be running as an HTTP server for Dify to connect. Start DBHub with HTTP transport:
```bash theme={null}
npx @bytebase/dbhub@latest --transport http --port 8080 --dsn "postgres://user:password@localhost:5432/dbname"
```
**Configuration:**
1. In Dify, navigate to **Tools → MCP**
2. Click **Add MCP Server (HTTP)**
3. Configure the server:
* **Server URL**: `http://localhost:8080/mcp` (or your DBHub host)
* **Name**: `DBHub`
* **Server Identifier**: `dbhub` (permanent, max 24 characters)
4. Click save. Dify will automatically discover DBHub's tools.
**Using DBHub Tools:**
Once connected, DBHub tools are available in:
* **Agents**: Tools appear alongside built-in tools, use "Add All" to enable all DBHub tools
* **Workflows**: Tools appear as available node types
**Multi-Database Setup:**
For multiple databases, use a config file:
```bash theme={null}
npx @bytebase/dbhub@latest --transport http --port 8080 --config /path/to/dbhub.toml
```
**Demo Mode:**
For testing, use the built-in demo database:
```bash theme={null}
npx @bytebase/dbhub@latest --transport http --port 8080 --demo
```
**Limitations:**
* Dify only supports HTTP transport (not stdio)
* DBHub must be network-accessible from Dify
**References:**
* [Dify MCP Documentation](https://docs.dify.ai/en/guides/tools/mcp)
### LibreChat
DBHub can be integrated with [LibreChat](https://www.librechat.ai/) using either **stdio** or **Streamable HTTP** transport.
```yaml librechat.yaml theme={null}
mcpServers:
dbhub:
type: stdio
command: npx
args:
- -y
- "@bytebase/dbhub@latest"
- "--dsn"
- "postgres://user:password@localhost:5432/dbname"
timeout: 60000
```
For demo mode:
```yaml librechat.yaml theme={null}
mcpServers:
dbhub:
type: stdio
command: npx
args:
- -y
- "@bytebase/dbhub@latest"
- "--demo"
timeout: 60000
```
```yaml librechat.yaml theme={null}
mcpServers:
dbhub:
type: streamable-http
url: http://host.docker.internal:8080/mcp
timeout: 60000
```
**Docker Networking:** When LibreChat runs in Docker (e.g., with docker-compose), use `host.docker.internal:8080` to connect to DBHub running on your host machine. This is Docker's special DNS name that resolves to the host's IP address.
For native installations, use `http://localhost:8080/mcp` instead.
**References:**
* [LibreChat MCP Documentation](https://www.librechat.ai/docs/configuration/librechat_yaml/object_structure/mcp_servers)